Homeowners need to understand how a rooftop solar system operates, how long it takes to install, and how much it will cost before committing to purchasing and installing solar panels. Because homeowners typically have questions about the process of going solar, it is often delayed and therefore does not get done. If a homeowner wants to go solar but does not know when they can actually receive their permit, find out how long the process will take, or understand the technical specifications involved with the requested solar panels, the homeowner may be unable to move forward with their plans.
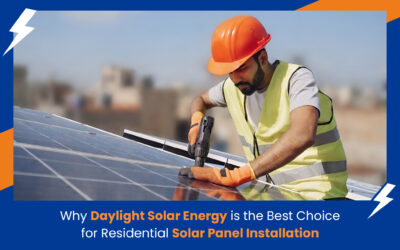
Daylight Solar Energy implements its home installation process through a systematic approach that consists of distinct stages. The requirement of upfront knowledge about upcoming processes enables you to navigate the experience with greater ease, as you will comprehend the current process status without needing to contact others for information.
First, understanding what a residential solar panel installation actually involves
For many people who sign up for their residential rooftop solar installation, they may not know what to expect as they move through the process; therefore, the lack of clarity can create a sense of anxiety. If you are a homeowner contemplating installing solar energy, you may be asking:
“How does the entire procedure work?”
“When will I get my permit?”
“Where can I follow up on my application?”
These are common and normal questions.
At Daylight Energy Solar, every photovoltaic (PV) system is installed on the home through a well-defined process. As you learn the steps of the installation from beginning to end, the experience will become much less daunting, and you will not need to constantly search for where your project is located.
Step 1: The site visit and understanding your energy usage
The initial part of the solar process for a home is having a member of the Daylight Solar team come to visit your home for an assessment. This is a critical step in the installation of solar panels on your home. The team member will look at the direction your roof faces and how much usable space is available to put solar panels on. Also, the team member will check to see if anything nearby creates anything casting shade on your roof during the day, and any areas that may create partial shading will affect how much energy the solar system you are installing will produce. Shade analysis is an important part of the process when designing residential solar systems.
The design team will also look at your electricity bills over the last 12 months in order to determine how much electricity your home consumes and the times of day you are consuming it. Getting the correct size of your solar system for your home at the outset is one of the most important elements of installing residential solar panels. When you under-size, you’ll miss out on savings; over-size, and you will be wasting money on excess capacity you won’t use.
Step 2: Design a system for your specific home
After visiting your site, Daylight Solar creates a custom system design based on your rooftop specifications and your family’s energy consumption needs. The project delivers complete design documentation, which includes the panel layout and wiring plan, and inverter installation location and shading analysis, which verifies year-round solar exposure for the panels. As part of a detailed rooftop solar installation guide, the design also considers how solar panels are installed on a roof for maximum efficiency and long-term performance of residential rooftop solar panels. It also calculates the expected annual generation in kilowatt-hours, which translates directly into what you can expect your bill to drop by.
You receive a written proposal covering all of this – panel specs, inverter model, estimated generation, full cost breakdown, subsidy amount, and a payback estimate based on your actual consumption data. This is a document built specifically for your home, ensuring your residential rooftop solar panels setup is optimized, not a generic template. You should have everything you need to make a proper decision before any money changes hands.
Step 3: Choose the right panels, inverter, and components
Once you approve the design, Daylight Solar finalises the equipment. Panels are chosen based on efficiency, how they handle Gujarat’s summer heat, and what the manufacturer’s warranty covers over 25 years. The inverter is matched to the system size and the type of grid connection your home has.
The smaller parts, including all mounting hardware, cables, junction boxes, and earth connections, are also specified at this stage. No one pays much attention to them, but these are the components that will define the long-term safety and reliability of the system. The efficiency of any solar power system is only as strong as its weakest connection.
Step 4: Government approvals and the subsidy application
Before the physical work on your roof begins, Daylight Solar submits the net metering application to your local DISCOM and, where it applies, registers the installation on the PM Surya Ghar Muft Bijli Yojana portal to claim the central government subsidy. This involves uploading the system design, ownership documents, electricity account details, and vendor information.
The DISCOM then issues a technical approval for the grid connection. This part typically takes two to four weeks. Daylight Solar tracks the status and follows up where needed. The physical installation can start once this approval is in. The subsidy gets credited to your account after the DISCOM inspector visits to verify the installation, usually within 60 to 90 days of the system going live.
Step 5: Preparing the roof and installing the mounting structure
The installation team begins their work on installation day by installing the mounting frame together with the panel support structure. The residential rooftop solar system installation process requires this procedure because the system must be anchored with sufficient strength to withstand wind loads, heavy rain, and panel weight for multiple years. For the flat roofs common across Ahmedabad and Gujarat, a tilted frame is used to angle the panels at the ideal pitch for maximum yearly generation. For sloped roofs, a rail and clamp system attaches to the roof structure without needing large holes drilled through it.
The frame is made from hot-dip galvanized steel or anodized aluminum to resist corrosion from monsoon moisture. The fixings are stainless steel. In residential rooftop solar systems, a mounting structure that shifts in heavy wind is a safety problem, not just a performance one, so this part of the job does not get rushed.
Step 6: Installing the panels and running the wiring
With the frame in place, the panels are lifted onto the roof and secured in the positions the design specified. As part of professional solar panel installation services, the DC wiring connects the panels in the right series or parallel arrangement, all run through UV-resistant conduit to protect against sun and rain exposure. Before anything connects to the inverter, each string’s voltage and current are tested against the design values. If something does not match, it gets fixed right then, not discovered as a fault six months later.
Step 7: Install the inverter and connect it to the grid
An inverter system is used to take power from solar panels that is produced in direct current (DC) and convert it into alternating current (AC), which is what your home appliances require. The inverter typically can only be installed indoors, and technicians prefer to place them near the main service panel as a form of protecting the inverter from rain and heat.
The rooftop solar panel system will be connected to the house’s main service panel via a disconnect switch at this stage of the installation, and then this disconnect switch becomes a critical component of the installation process. After DISCOM has completed its installation of the bi-directional meter, the inverter system will be connected with the grid; then the solar system installation is complete.
Step 8: Test, inspect, and hand over to you
Testing for voltage at the inverter, communications between panels and inverter, grid connection stability, and the monitoring setup will be done before handover of the complete system. If your Inverter has a WiFi monitoring module, Daylight Solar will set this up on your phone, and you can view daily generation figures on the application.
The net metering connection must pass inspection by a DISCOM inspector who will check that the installation meets the applicable technical requirements. Daylight Solar will coordinate this inspection and will be present for the inspection. You will receive a Commissioning Report, a complete set of Warranty documents, and an explanation of how to view system output on the monitoring Application.
After Commissioning: Keeping the System Running Well
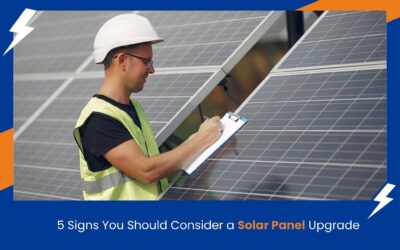
The process does not end at handover. Most modern inverters report generation data daily, so any drop in performance from dust accumulation or partial shading shows up quickly and can be fixed before it costs you much. In Gujarat’s conditions, Daylight Solar recommends cleaning the panels at least twice a year. As part of regular solar panel maintenance services, this helps prevent dust buildup, which is common before and after the monsoon, where a dirty panel can lose 15 to 20 percent of its output.
Annual solar panel maintenance services cover panel cleaning, electrical connection checks, inverter health checks, and earthing verification. A system that gets proper attention consistently generates noticeably more electricity over its lifetime than one that is left alone. For most homeowners, that difference adds up to several thousand rupees a year in savings that would otherwise be quietly lost.


0 Comments